Saturday, July 6, 2013

DIY Kids Mud Room Bench

 Continuing on with my bench craze.


Okay, so I found this little beauty at a garage sale for $1.50. Not so pretty you say. Well a little paint and a little love and you will be surprised.


My children constantly walk in and throw their backpacks and shoes right in front of the front door. My solution is we need some sort of storage or mud room.

Well since an actual mud room is out of the question storage it is.

I hung that pretty rack right above this soon to be pretty storage solution. Perfect height for the children.

I took these shelves and spray painted them brown. Then I took some padding. Hobby lobby has them for $4 each. Don't forget the 40% off coupon. I bought 2 and cut to size. Next I took some left over fabric and glued it to the padding. Yes, this is left over material from the fabric bin. After that I glued the padding that was all ready attached to the fabric to the top of the shelf.


Perfect for those little shoes that can't find their way.


With the hooks above. Now they put their shoes up.
Total cost was about $13.50 and that included a bottle of brown spray paint. The material was scrap, so I did not include in my total.

Hope this gives you an idea and have fun!!!!

Coffee Table Bench


Here is another DIY I did back before I had the Blog. There are not any pictures on how to do it just the before and after.

I wanted one of those padded benches for the bedroom, but again the cost. I just couldn't spend $100's of dollars on one.

I scoured the Goodwill's and flea markets even Craig's list looking for the perfect coffee table. I was only willing to spend $20. You guessed it no such luck. A friend of mine had one sitting in her garage that she had empty pots sitting on. I asked if I could have it. I was told she had this coffee table since your oldest boy was 7. I am guessing the table is about 25 years old. Well she gave it to me. Even with crayola marks on the underneath.

Here are before pictures. Again please ignore background messes. Didn't know I would be posting for the world one day.


So, how did I transform this coffee table with the split wood down on side. Easy Peasy.

If you flipped the table upside down you can see where the screws are that hold this entire thing together. Unscrew them and take the top off. My husband then took the frame to the garage. He added some wood glue where the split was and placed a vice on it to hold it together. Left it like that for a day.

I then went to Hobby Lobby. Well now I know why those benches are so expensive the padding was not cheap. I opted for the 1 1/2 inch thick. It comes in a big roll and the cost was about $40. Don't forget the 40% off coupon. Then I started looking for the fabric. I believe I bought a yard. Your fabric size will vary by the size of the table and the thickness of the padding. Now to put this sucker together.

I took the table top and laid it face down on top of the unrolled padding. I then took an exacto knife and started cutting around the table. When that was finished I flipped the table top back over and glued the padding to it. I placed a heavy board on top of it just to hold the padding in place. It wanted to roll back up on me. While that was sitting I measured for my fabric and cut the amount needed.

This next part took two of us. Only because I didn't want a lesson on how to use the air staple gun. Flip the table top over face down on the center of your fabric. The padding should be well stuck after 15 - 30 minutes. We started on the end right in the center. Pull the fabric tightly around and staple in place. There was a little over hang from the padding but when pulled tightly gives the edges that round look. Just keep pulling and stapling. After we got the ends done. We did the sides. I kept looking underneath to make sure there was no wrinkles and that the fabric was pulled tight. Finally we stood it up on one end while he stapled the material to the underneath.

When finished stapling husband took it the garage and reattached the top to the leg frames. Afterwards I used wood oil and gave the legs a pretty shine.  I am still on the look out for another table especially one that has a really pretty ornate siding, but I am happy with my 1st DIY bench. This is the same side that was split in the before picture.


Not bad huh. Since the table was a freebie my only cost was the padding and the material. Total was about $35.


Friday, July 5, 2013

DIY Fabric Bin


Here is another blast from the past. I love those big tote bins that are fabric covered. I just hate paying for them $20 - $30 for one.

Well I decided to make my own from one of the many empty boxes we always seem to accumulate. Believe it or not this time it wasn't a diaper box.

I took a good sized sturdy box and cut the flaps off. I wasn't to worried about the scraggly pieces because I was going to cover them up. I found a nice striped fabric that I liked and a solid color that matched. I got a yard of the striped and 1/2 yard of the solid. Depending on the size of your box will determine how much fabric you need.


I placed the box in the center of my fabric. Fabric goes pattern side down. I placed the solid color inside the box and started gluing it to the bottoms and the sides. I didn't go all the way up since I was going to bring the striped material down. After the solid was in place I draped the striped over the side. I started gluing it down. I then cut off the excess. I folded where I cut under and glued that down just so I couldn't see my uneven line.


I like the way it looked and currently it is being put to good use storing toys in the playroom.

Have fun..

Apple Walnut dipped in Caramel Cookies


Here is a sweet treat I did a while back. What I don't get is I HATE baked Apples or even just Apples, but I sure do make a lot of stuff with them. Good thing is it keeps me from eating them. According to the family these were addicting.

I only took the one picture, but here is the recipe.

  • Here you go. Don't freak out it seems like a lot, but it only took me about an hour and that included cleaning up the mess.
    Filling
    1/3 cup chopped unpeeled apples
    1/3 cup evaporated milk
    1/3 cup sugar
    1/3 cup chopped walnuts (or whatever you like)

    Put that in a saucepan and cook and stir. It will start to thickening up.
    While this is cooking I started making the dough


    Dough:
    1/2 cup butter (softened)
    1/4 cup powdered sugar
    1/4 cup brown sugar
    1 egg
    1 tsp vanilla (I didn't measure it but it looked to be about that much)
    1/4 tsp salt (I didn't measure it but it looked to be about that much)
    2 cups flour
    Mix the sugars and butter first. It will get fluffy. Don't forget to stir the filling.

    Beat in the egg and vanilla. Then combine the flour and salt. I added the flour slowly to make sure I got it mixed.
    The filling should be done now. Remove from heat and let it cool.
    Take the dough and start rolling balls I did mine at about 2 inches or so. Once rolled the filling should be cooled off.
    To fill the cookies flatten out the ball and place some of the filling in the middle then fold the dough over and reshape into the ball. Place on a cookie sheet and bake at 350 for 12-15 min. I actually baked mine for 15 min.
    I cleaned up that mess while the cookies were baking.
    After the cookies are done I started on the caramel while they cooled.
    Caramel Dip
    14 oz package of caramels.
    2/3 cup evaporated milk
    Heat over low heat until melted. Then dip your cookies and place on a wire rack so excess drips off.
    Enjoy....

DIY Dog Food Can


I haven't posted anything in awhile. Been busy with work and getting ready for one of the Lil Laroux's to turn  the big 3. I decided to post a DIY project I did back before I had the blog.

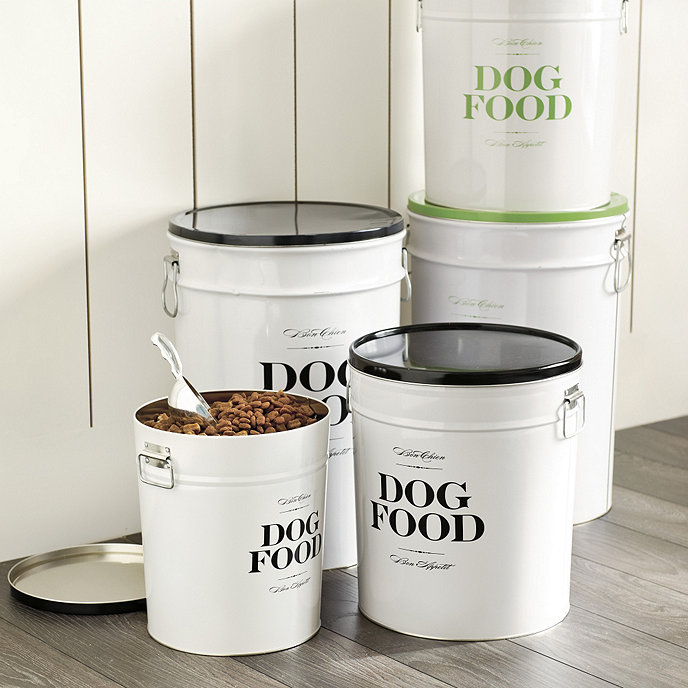
We have all seen these expensive fancy dog food cans. $54.00 ouch.
Bon Chien Food Canisters

Here is how I did mine for the price of a popcorn tin and a few odds and ends. Total was about $10.00.

It is Christmas time, all the family is around munching on the 3 different flavored popcorn. What to do with that popcorn tin? My Mom supplied this one for me to play with.


Granted my stenciling work isn't that pretty, but all I need is more practice and worse case I could buy some of the self adhesive letters from the scrap book section.

I spray painted the lid and the tin a manly dark blue. I found a paw print stamp at Hobby Lobby for $2.00. Don't forget the 40% off coupon. They also had this cute ribbon which I glued around the rim of the lid. I always have paint here at the house. I have a shelf in the garage that looks like the paint section at Lowe's.

I took the letter stencil and wrote dog food on one side. Again the stenciling needs work, but I was happy with my first go at it.


My finished version. Hope it gives you some ideas and have fun.